

Hey friends!!
I’ve been busy and extra busy. Want to know why? Well, I’m planning this pilgrimage, right? I was planning for fifteen people, maybe twenty and it looks like I should aim for forty-fifty people. Yowza.
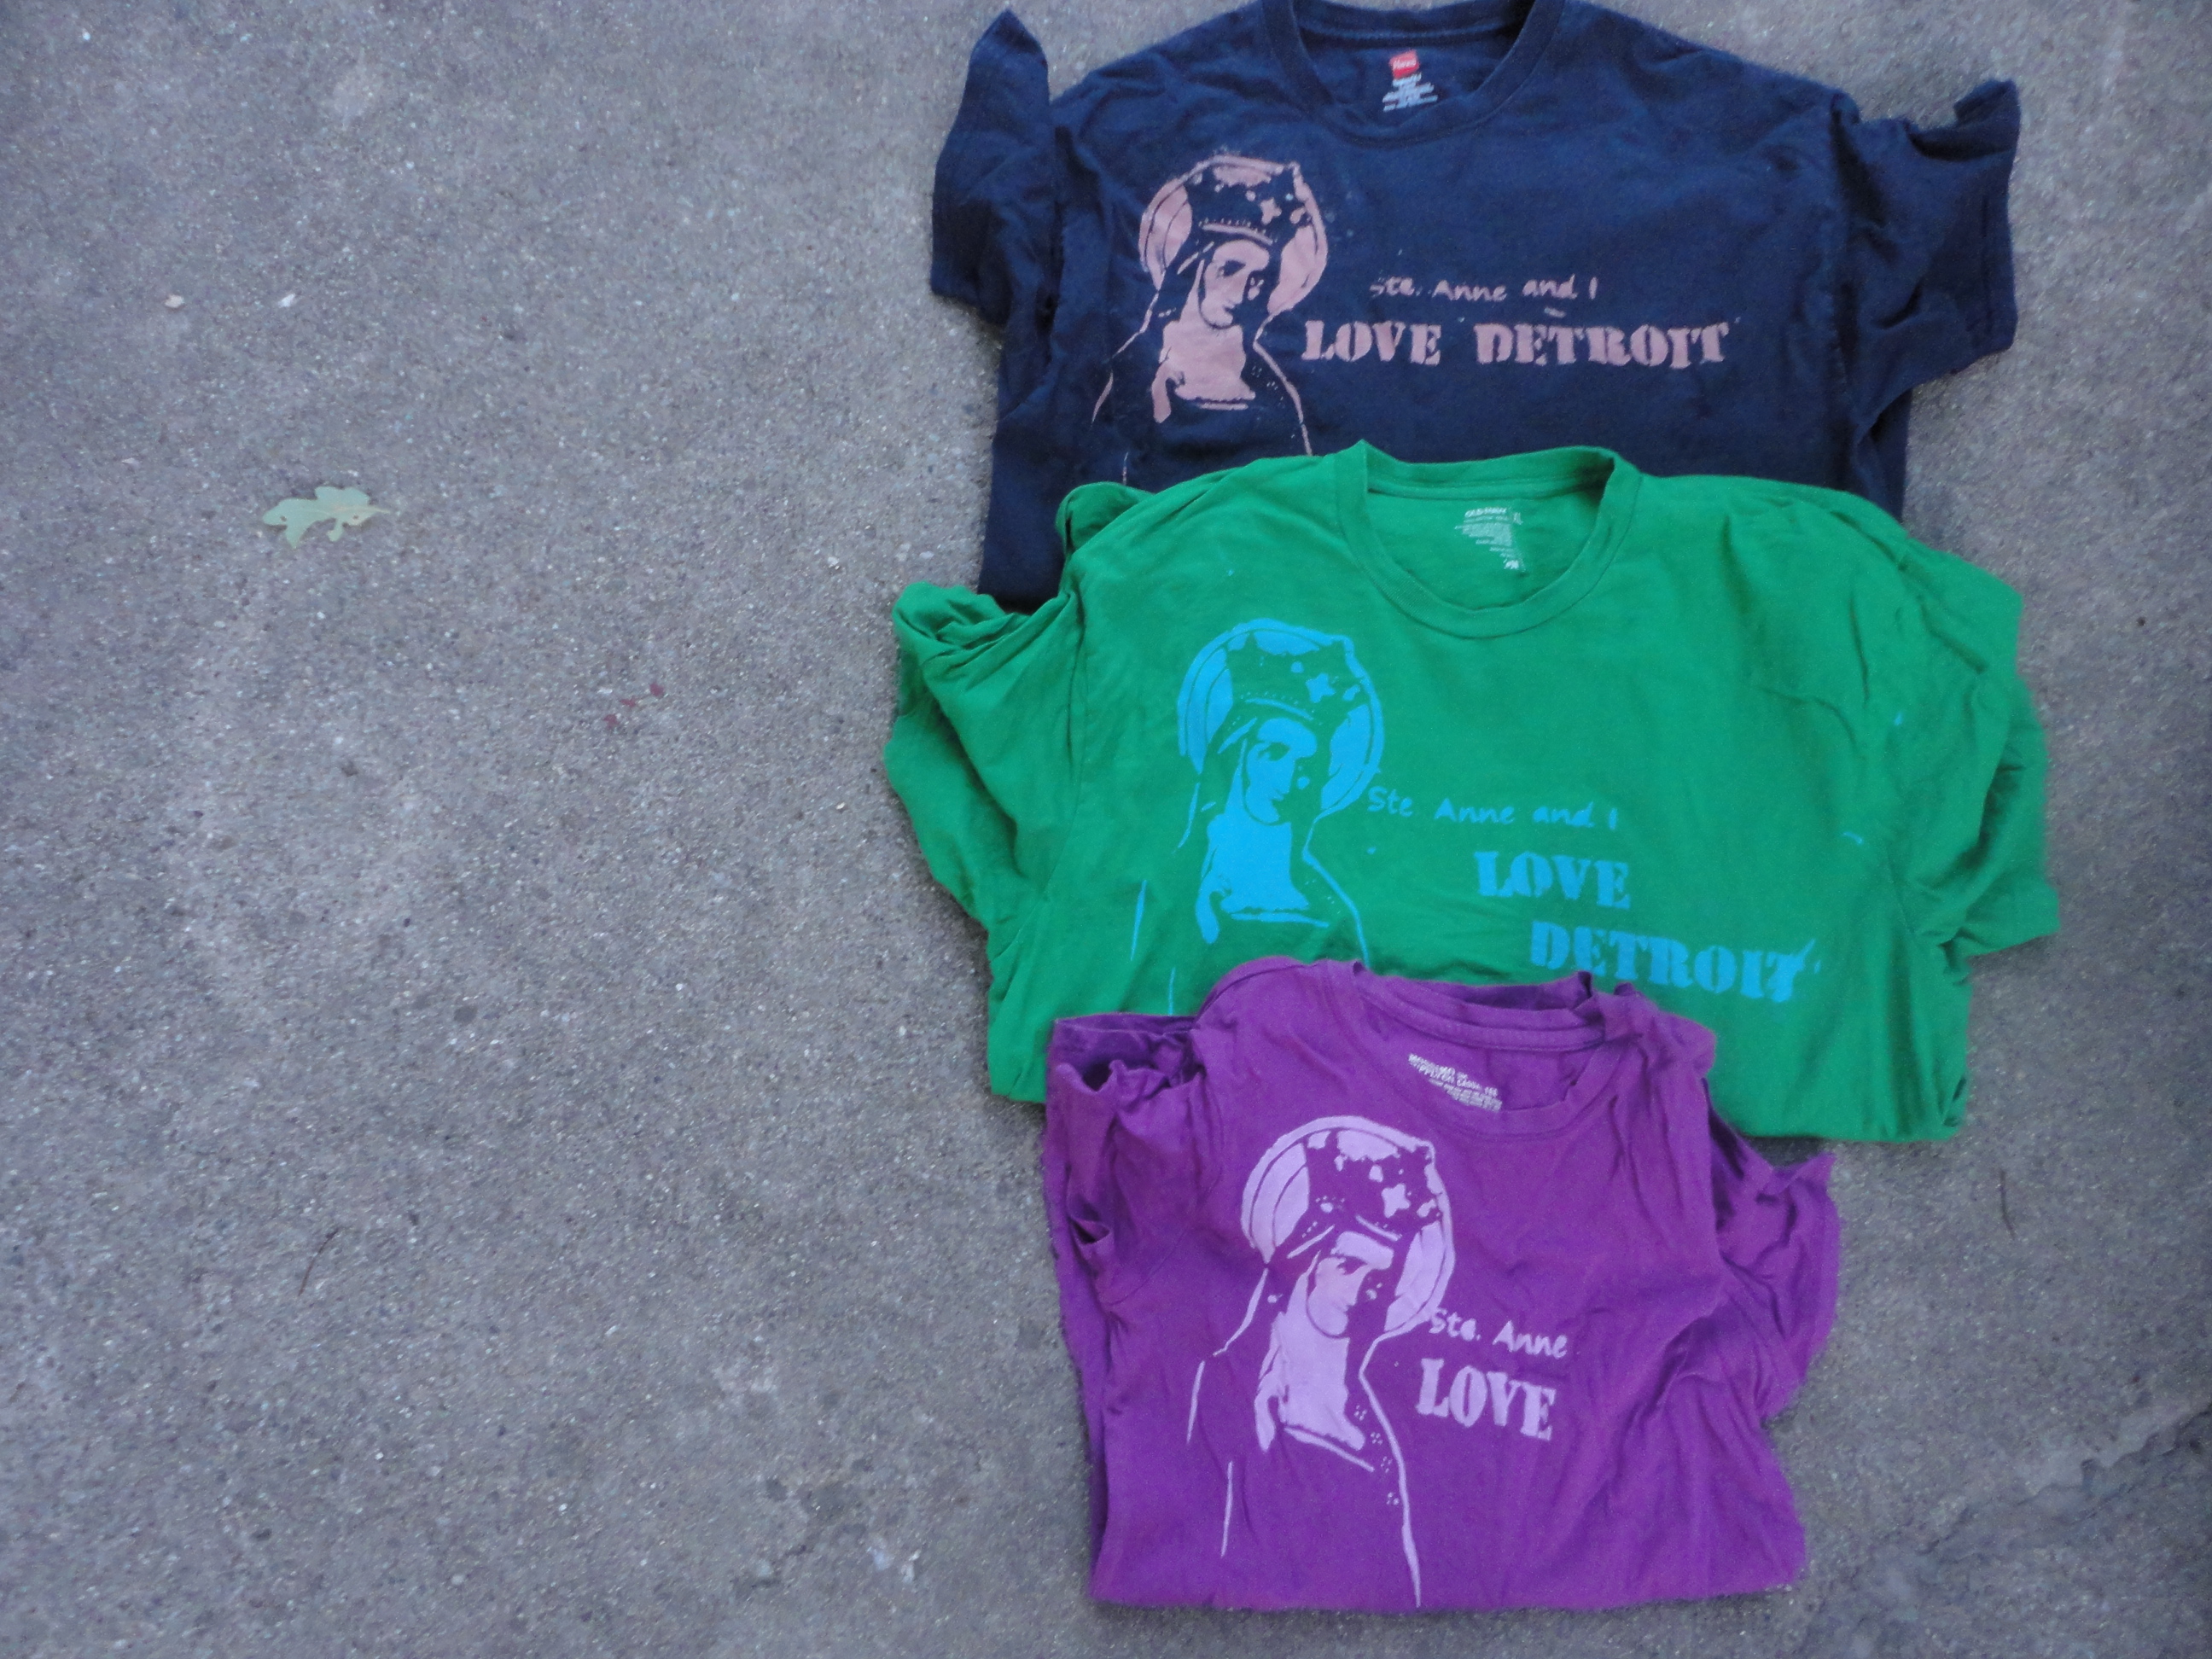
Guess what that means? Making more shirts!
I’ve created a sweatshop in my backyard. Kidding. But I have busted butt the past few days cranking these suckers out. I’ve used a method called “discharge dying” where you essentially use bleach or something like bleach to lift the dye from the material, producing a design that is darker than the rest of the shirt.
I watched a lot of internet and decided to use a process that utilizes dishwasher gel with bleach in it. I liked how the gel gave more control than liquid bleach, I liked how the material reacted slower and not as harshly, I liked that the chemicals didn’t smell as repulsive. 🙂
So! What you need is:
- Play clothes for you to wear (working with bleach, remember!).
- Dishwasher gel. I used Cascade, bought it at a local store.
- Shirts. Aim for 100% cotton, as those dyes lift better. I accidentally bought one with 5% spandex and you can see in the video that the dye does not lift as well. I upcycled these from a local thrift store, making sure to buy well, i.e., no stains, no pilling, no worn out armpits, etc.
- Stencils! I made several, all on a thin plastic I bought at the craft store. My designs were either: freehand, text, or a picture made into a stencil design using tutorials like this one.
- Gentle glue to hold the stencil down.
- Something to go inside the shirt so the bleach doesn’t bleed from one side to the other. I used weatherproofed cardboard…we had it around from another project, precut and everything.
- A paintbrush and a place to hold the gel, I used a paper plate.
- Buckets for: rinsing, neutralizing the bleach and rinsing again. For neutralizing the bleach, I used a peroxide/ water recipe I found here. Note that that homegirl shares that vinegar is commonly believed to be a neutralizer but it isn’t. Hm. Good to know.
- Towel to dry off your stencils between use.
And you’re ready to go!

I would basically “paint” the gel over the stencil, then leave the gel to lift the color until it was a shade I liked. Then I would dip the design in a bucket of water, washing off any remaining gel with my hands. After the water I would place the shirt in the neutralizing solution for a few minutes (10-15). The other side of the neutralizing solution was another bucket of water for extra soaking, recommended by the internet, so I did it.

After that’s done: wash and dry the shirts and you’re good to go!
Want more information? I made a shaky video. Enjoy. You’ll probably enjoy it more if you don’t brush your hair before viewing. I sure didn’t brush mine before filming:
